Install Beams On The Ceiling.
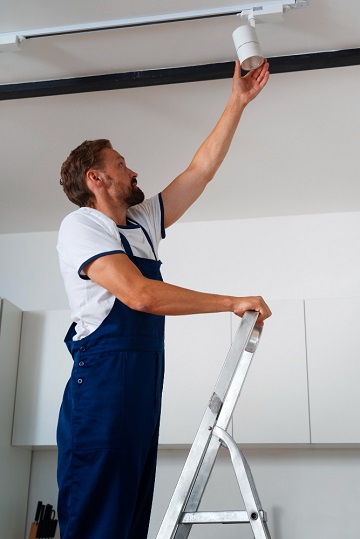 Wooden beams can greatly elevate a space, whether it’s a hallway or a living room. It turns out that you don’t have to be a superhero to be able to install one since the installation is very simple. The hardest part is making sure you measure right before cutting the foam with a hacksaw: “Cut them as tight as possible, almost squeezing a little so they fit,” says Mikel Welch, a New York interior designer and instructor at the Skillshare online learning platform. Although the beams probably won’t weigh more than 10 pounds, a partner you’re undertaking the project with can help you manoeuvre and install the beam while you seal the edge with Dap Alex Plus paintable latex caulk (Look, Mom, no screws! ). Let each beam dry for about 20 minutes. Unless you can afford to refinish or rip out beams from an old barn, this will cost you a tenth of what you would pay for the real thing,” says Welch, noting that reclaimed wood can cost upwards of $1,500 per square meter, while Imitation wood costs about 4,000 pesos for a 1.5 by 3-meter beam.
A Corner Next To The Entrance
The space by the front door is precious territory, as you can use it for so many different functions, from hanging bags and sweaters to leaving dirty shoes so they don’t dirty the rest of the house. Libby Rawes, owner and lead designer at Sharp + Gray Interiors in Philadelphia, helped a family decorate their side entrance in this beautiful corner. And she knows what she’s talking about: “Clutter can have a huge effect on the way you live in your home, especially the door you walk through every day,” she says. “Using every inch for thoughtful storage can give a small space plenty of hidden organization, so you feel at ease when entering or leaving.”
Although this is a slightly more difficult home improvement project, it is worth the effort. If you’re unsure of your skills, garage space is a good place to experiment. Start by deciding how the space is going to function and what components you want and need shelves, cabinets, maybe a bench to sit on when you first arrive. Measure the space before deciding on the configuration. Home Planner offers customizable templates, for example. Or you can also go to a closet showroom where experts can help you with closet layout. This is where you’ll have to dust off your math skills to make sure all the measurements really add up.
Start with the panels. Once completed, work from the bottom up, Rawes suggests. Using prefinished butcher block and plywood as dividers, create a storage bench. Install the cabinets. Consider that you’ll probably spend two to three weekends on this project, as it requires some fine-tuning work, Rawes warns. However, the reward for doing it yourself is priceless: “To purchase and install yourself, the cabinet portion is at least in the $20,000 range,” says Rawes. “If you hired an architect, I imagine the cost could probably double or triple.”
Paint The Exterior Of The House.
They first power-washed the bricks to remove dirt and dust and then applied two coats of a dramatic dark charcoal grey (similar to Sherwin-Williams’ Emerald Exterior in Iron Ore). Painting the porous brick was exhausting, he says, but he watered down the first coat of paint so it would spread more easily. Instead of using a paint sprayer, Clarke opted to use rollers to avoid overspray and waste. Next, they moved on to cleaning and sanding the shutters and trim, which were painted black (such as Sherwin-Williams Emerald Trim Enamel Urethane Enamel in Tricorn Black). “Remember to paint both sides [of the shutters] since the back will be visible from inside the house,” he advises. The other challenge was reaching the upper sections of the house: Clarke had to rent scaffolding to do it: “I don’t think we would have accepted the project if it were two stories,” he notes. “I’m not afraid of hard work, but it’s been the most physically challenging home improvement project I’ve ever taken on, but it’s also something I’m immensely proud of.”